|
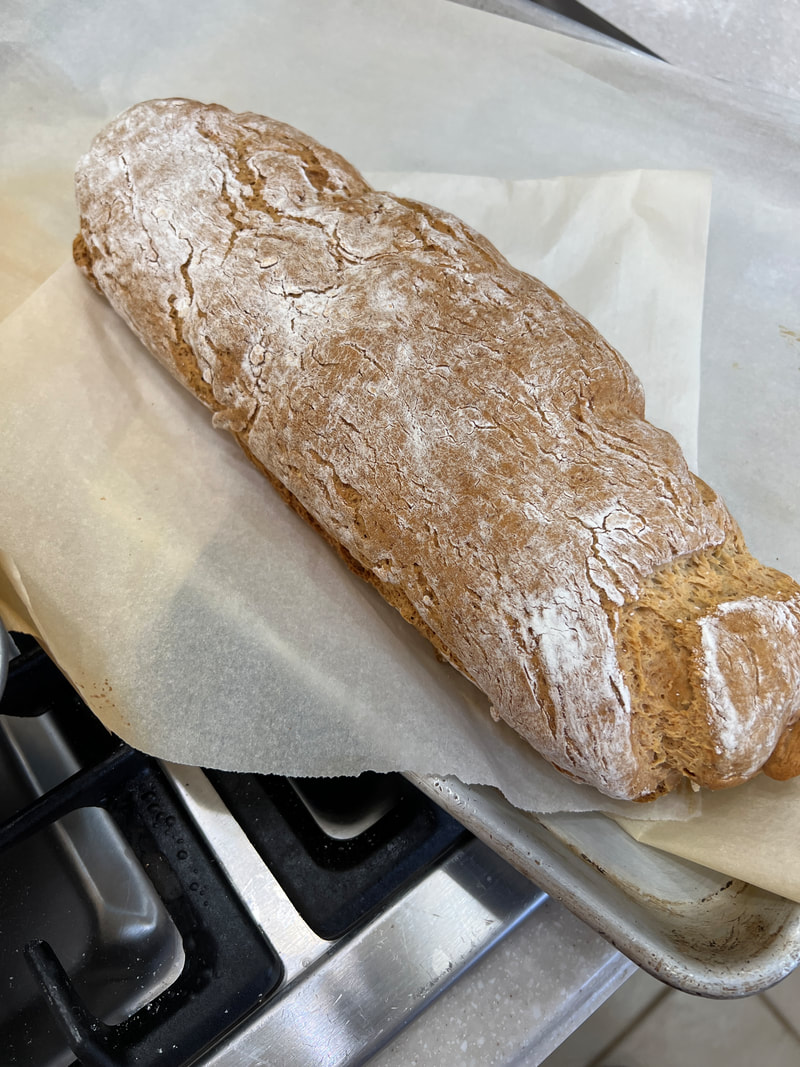
Bread Flour Mix 1 250g potato starch 100g tapioca starch 85g lupin flour 125g fine white rice flour 125g sweet sorghum flour 15g xanthan gum Mix with a whisk for a couple of minutes until fully blended. Bread Flour Mix 2 (with egg white protein powder **Used this bread flour mix on that gorgeous italian loaf 80g tapioca flour (starch) 280g potato starch 150g brown rice flour (fine) 100g white rice flour (fine) 75g egg white protein (others use why protein isolate-I was trying to reduce dairy) 15g xanthan gum Mix with a whisk for a couple of minutes until fully blended.
0 Comments
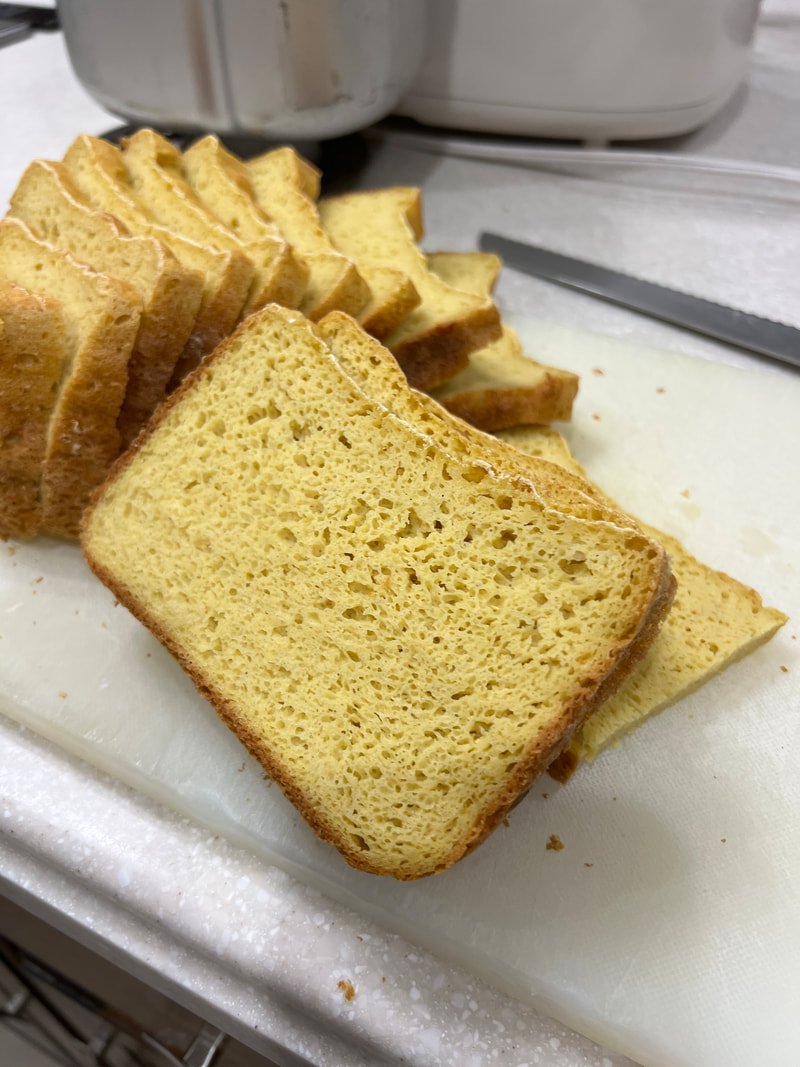
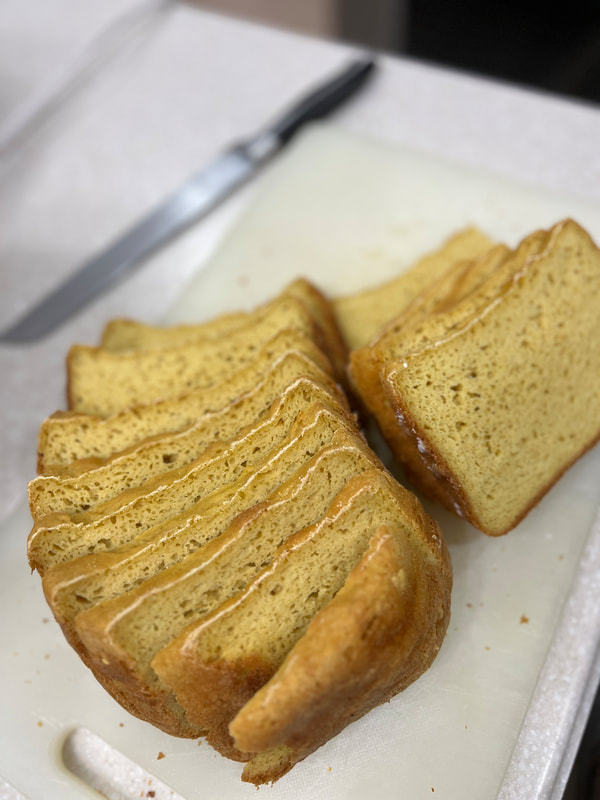
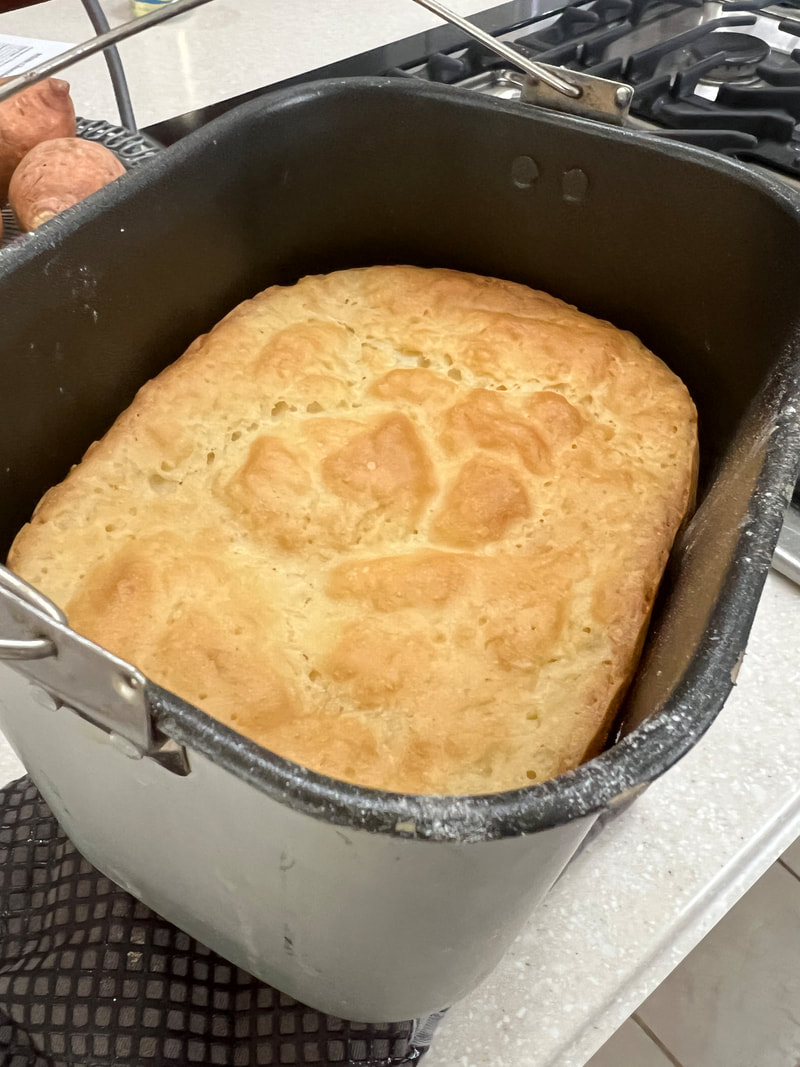
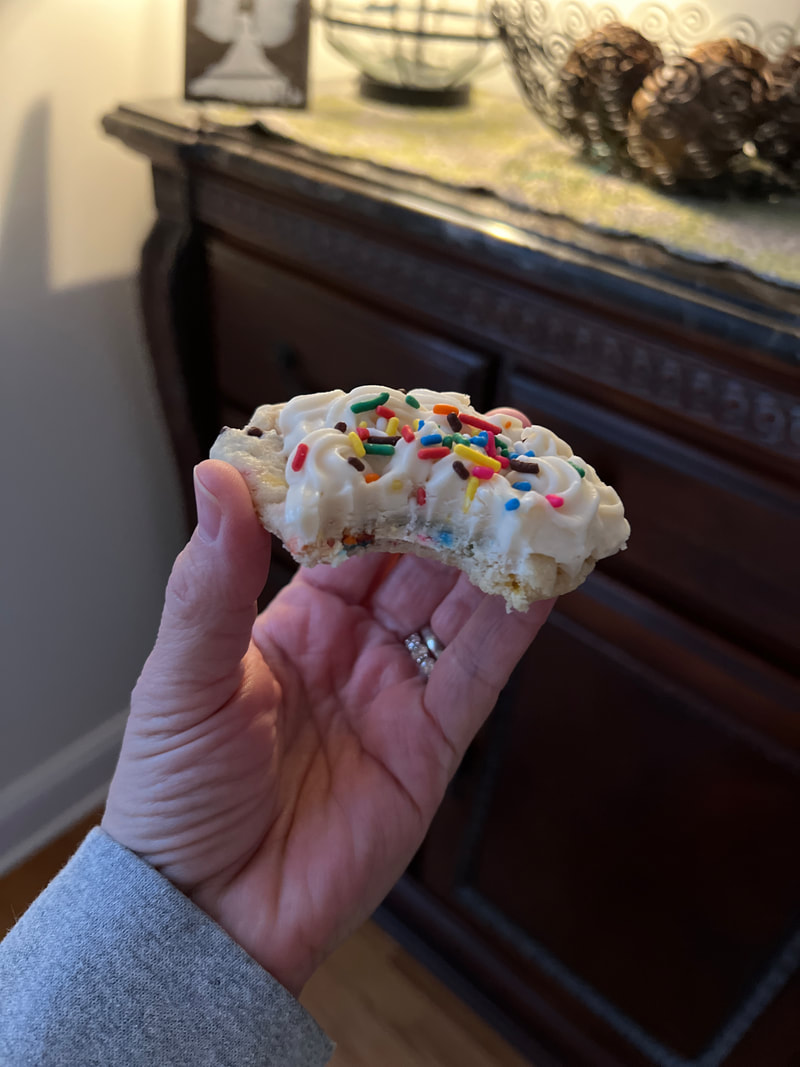
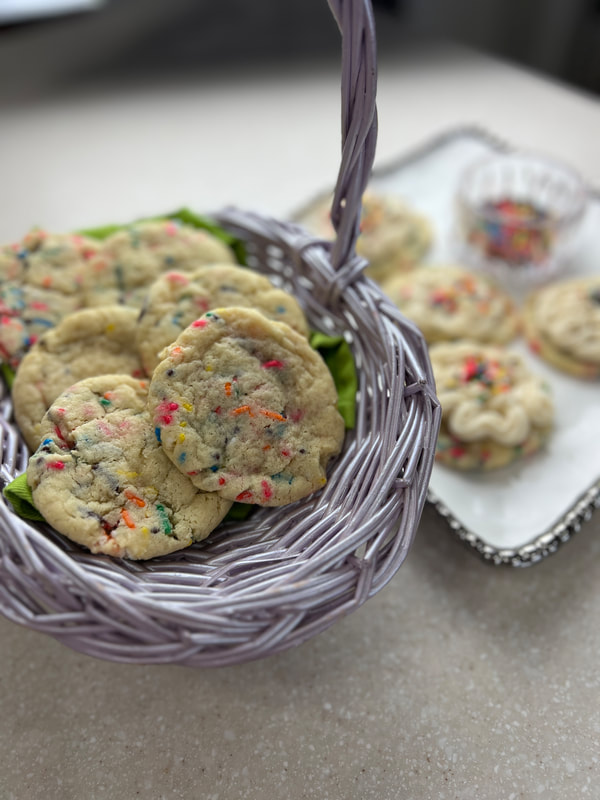
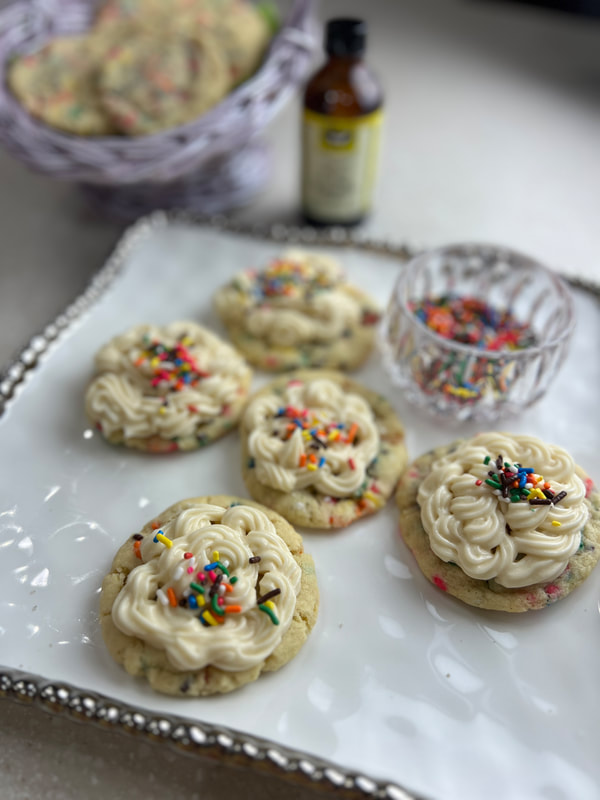
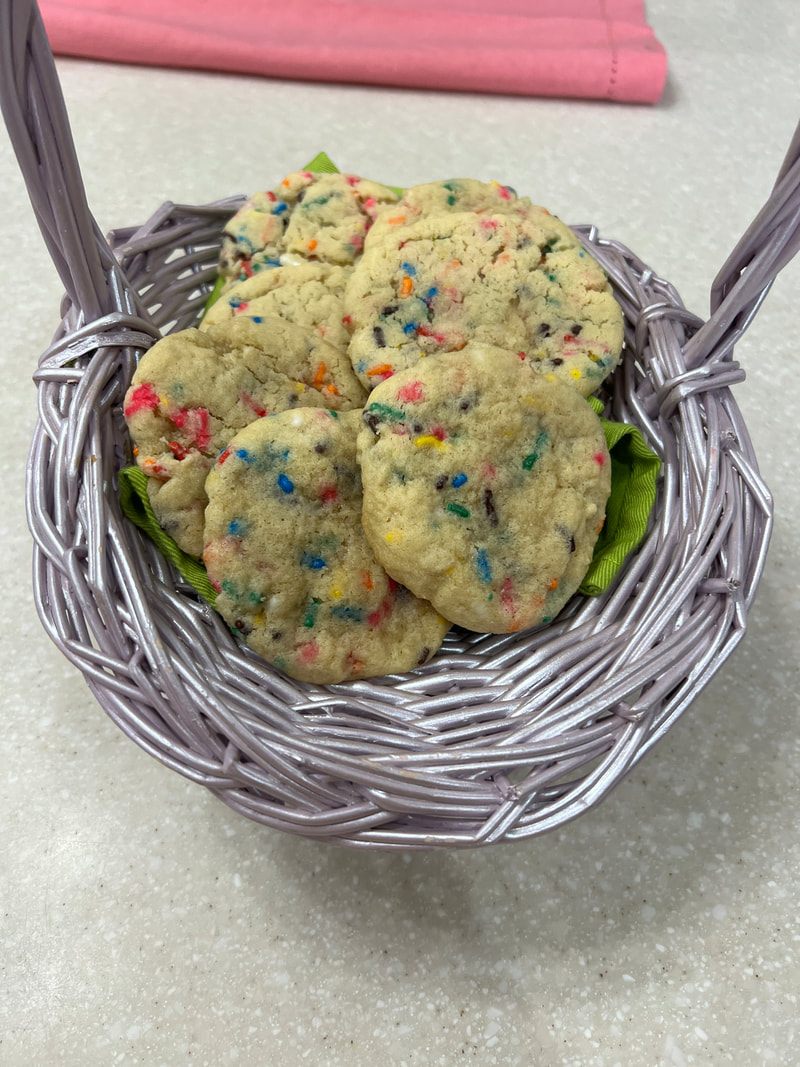
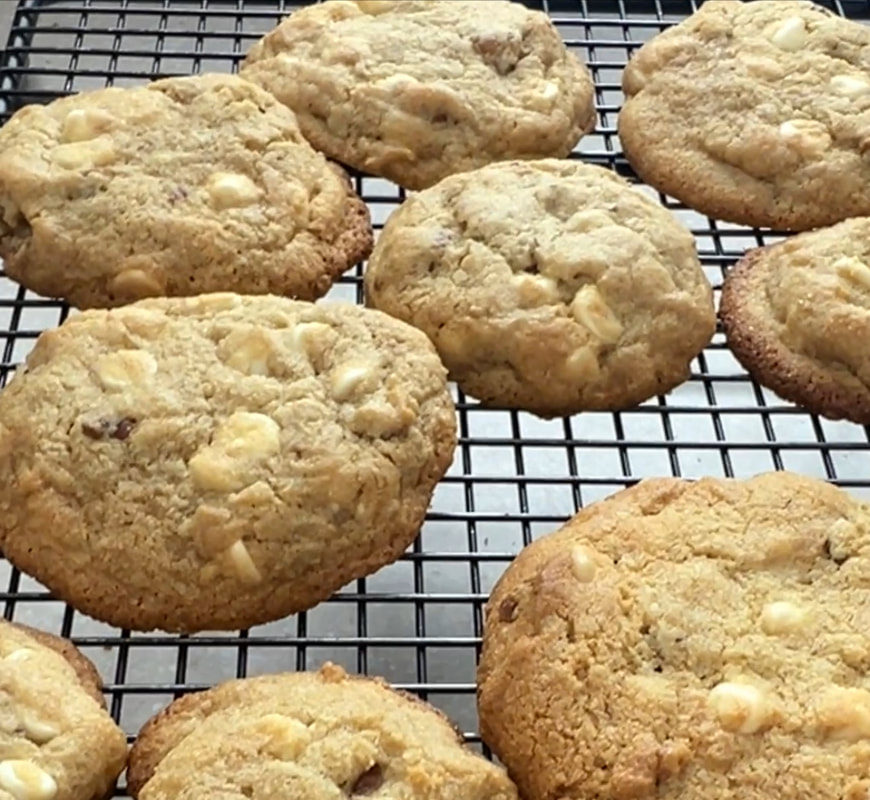
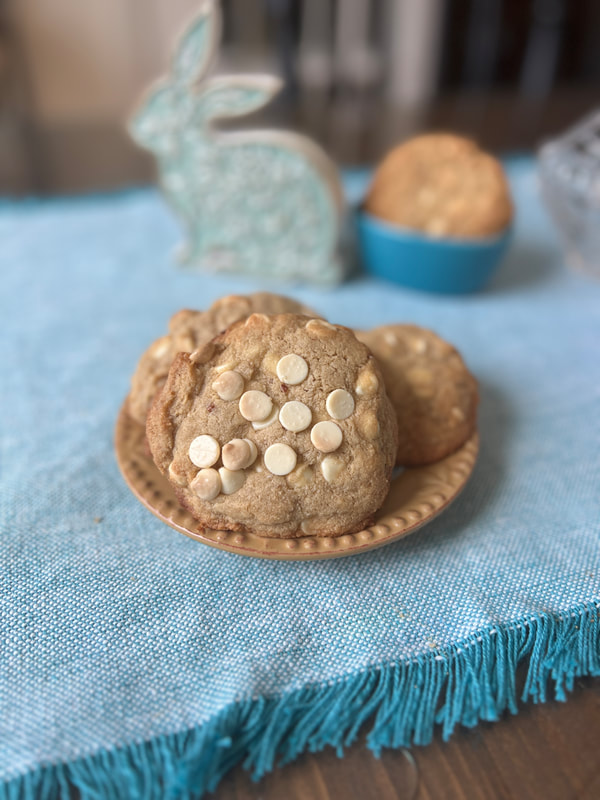
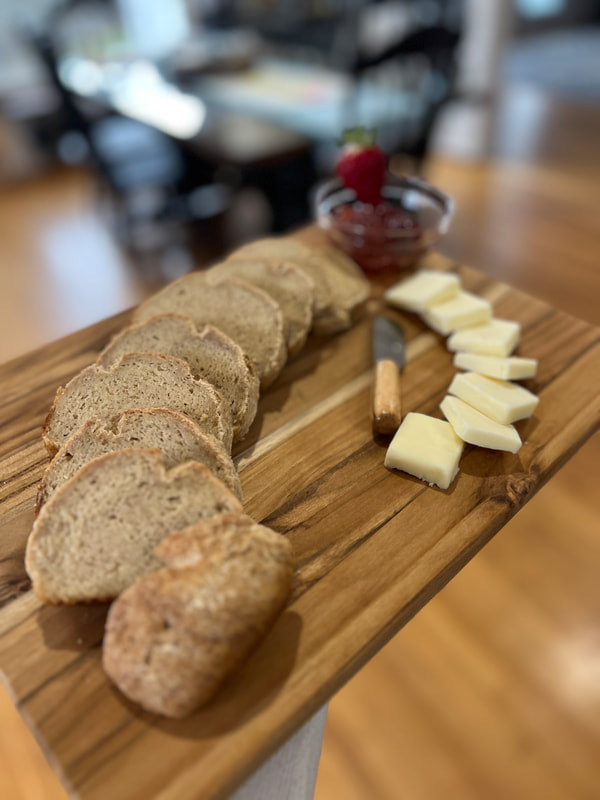
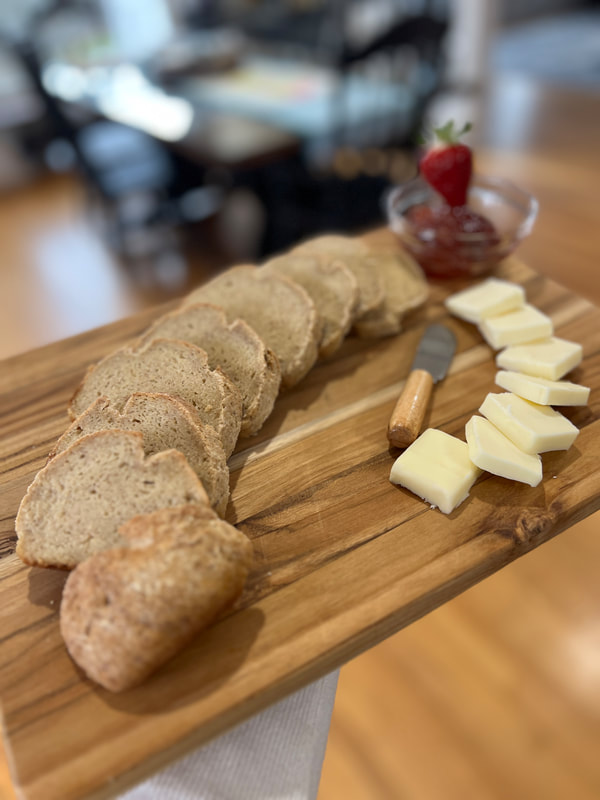
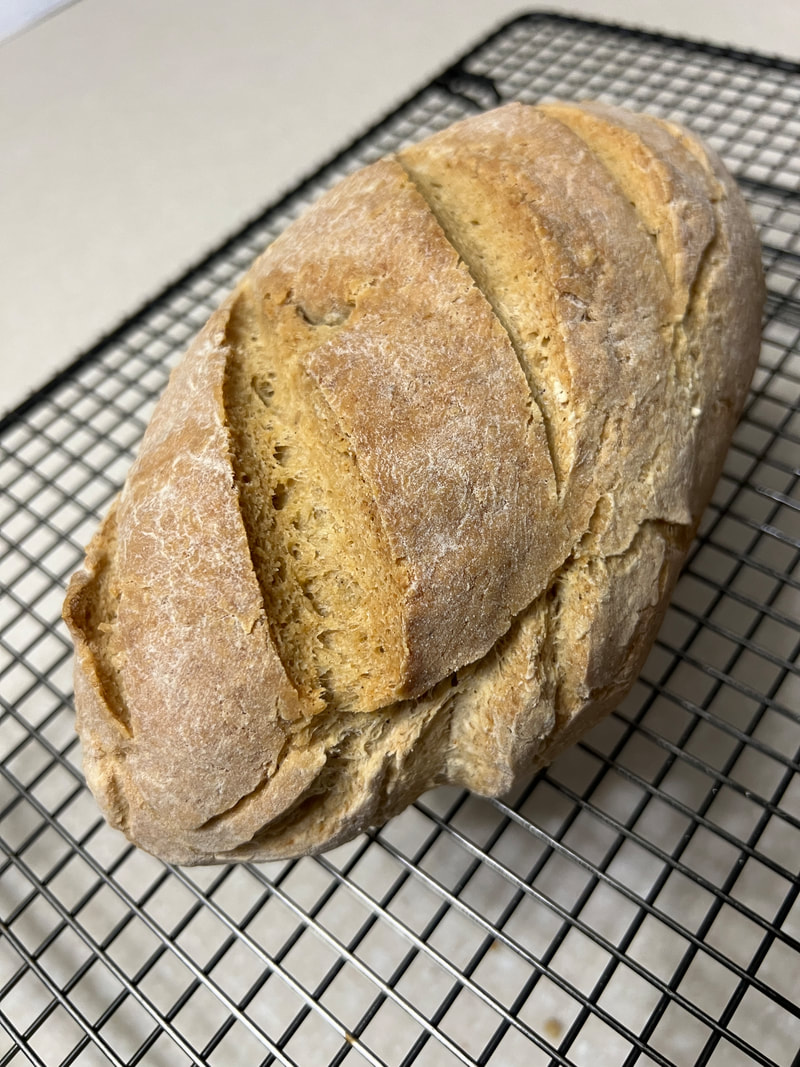
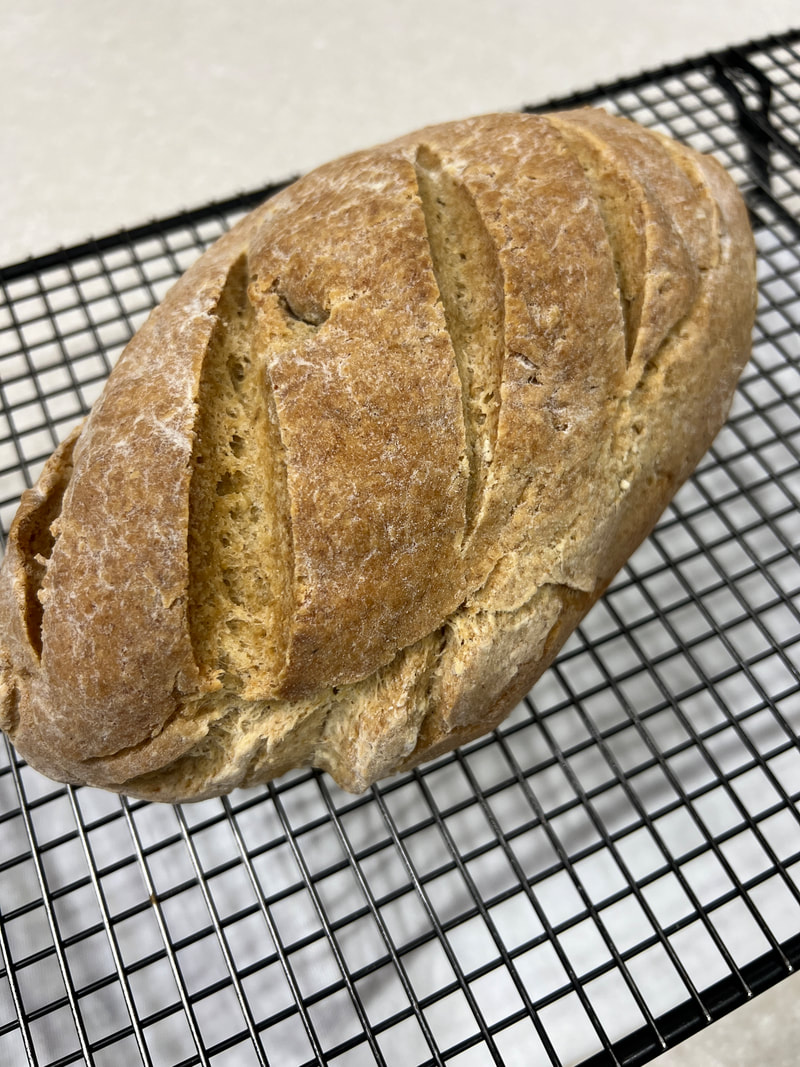
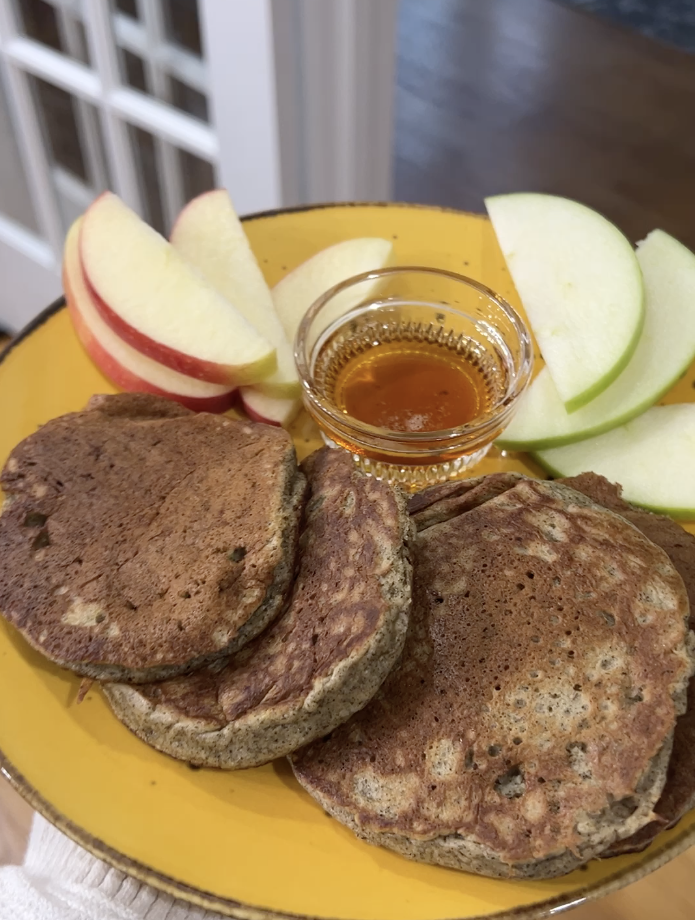
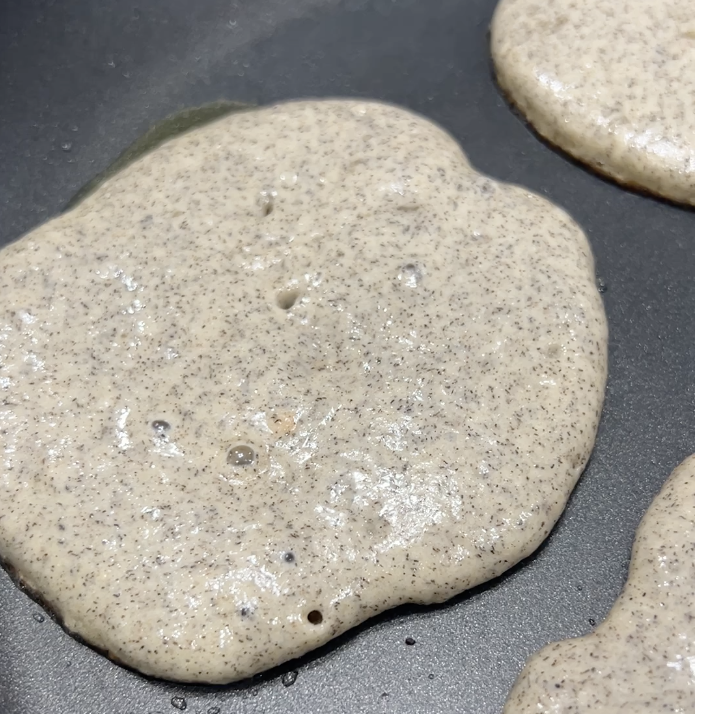
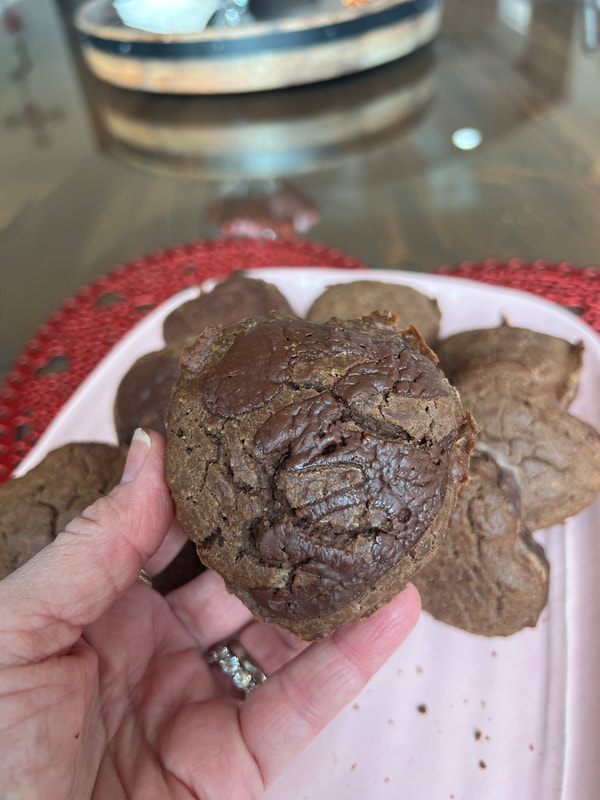
What fun cookies that are actually ADDICTING! If you think you are safe putting these in the freezer... think again! THEY TASTE AMAZING straight out of the freezer! Prep Time 40-45 minutes (chilling) Cook Time 11-12 minutes Makes 15-16 cookies Ingredients 1 ½ cups Jen’s gluten-free all purpose flour 1 Tbsp arrowroot flour/starch ½ tsp baking soda ½ tsp baking powder ½ tsp salt ½ cup unsalted butter room temperature ¾ cup granulated cane sugar 1 large egg, room temperature 1 ½ tsp vanilla extract ½ cup sprinkles multi-colored, reserve some for top if you choose to use the optional frosting OPTIONAL Frosting: (BUT I TOTALLY RECOMMEND!) 4 ounces cream cheese 2 cups powdered sugar 2 tsp vanilla 1 Tbsp unsalted butter. Top with your extra sprinkles OR singing dog vanilla salt! Directions 1. Combine the dry ingredients: flour, salt, cornstarch, baking powder, and baking soda in a bowl then whisk together and set aside. 2. Cream the butter and sugar in the bowl of your stand mixer fitted with a paddle attachment, mix on high until light and fluffy. 3. Mix in the egg and vanilla. Blend well. 4. Form into equal balls, place on parchment lined baking sheet and chill for 30 minutes in refrigerator. 5. Form into equal balls, place on parchment lined baking sheet and chill for 30 minutes in refrigerator. 6. Place in a preheated oven for 11-12 minutes. 7. Allow to cool before frosting (optional) Tips: Don’t over bake if you want a bit of a fluffy cookie. with almond flour Preheat oven to 350° Prep Time: 15 minutes Cook Time: 12-15 minutes (depending on the size of balls) Makes 18-20 large cookies Using almond flour for this recipe helps to give you a soft and luscious cookie that you will go back for seconds for sure! Ingredients: ¾ cup salted butter, softened (1 ½ sticks), softened ¾ cup of brown sugar, packed 3 cups almond flour, blanched 1 1/2 cups white chocolate chips ½ cup pecan, chopped 2 eggs, room temperature 2 tsp vanilla extract ¼ tsp almond extract ½ tsp baking soda ½ tsp salt ½ tsp xanthan gum Directions: 1. In large mixing bowl add the butter and sugar and beat until smooth and creamy. 2. Add all the dry ingredients into a separate large bowl and mix until combined well. 3. Add the eggs and extracts to the sugar and butter and mix. 4. Next slowly add the dry ingredients into the bowl and mix. 5.Add the white chocolate chips and pecans and mix. 6.Cover and place the bowl in the refrigerator for 30 minutes. 7. Form the dough into balls, flatten slightly and place 2” apart on parchment lined (or silicone) baking sheet. *KEEP the dough cool, place in the refrigerator in between patches. Dough should be cool to the touch. 8.Bake time for times suggested below. The cookies will be crispy on the edges and soft in the middle! ENJOY! *Small ball(flattened) about 1 ½” =10 minutes *large ball (flattened) 2 ½-3 inches= 14-15 minutes Sour Dough Starter I waited 20 years to make my first gluten-free sourdough and I don’t want you to wait that long to try it. I read tons of people opinions, articles, blogs and recipes and this is what I came up with… don’t judge yourself! Give the sourdough starter a try and you will be so happy that you did. Begin with brown rice flour and if you find this to be easy and you enjoy making this type of bread then you can branch out to other starters. The best advice I can give is to be patient and a bit forgiving of your learning process. I went from watching my starter take a week to feeding it enough and having a starter within. Once I told myself there was NO WRONG WAY of playing, I became obsessed! Have FUN! Ingredients: Brown rice (I like to use fine) Filtered water, room temperature A towel Mason jar or wide mouth glass jar DIRECTIONS 1. To begin, weigh out 50 grams of brown rice flour and 50 grams of filtered room temperature water. 2. Mix together well and cover with a towel and secure loosely with a rubber band. I suggest using a wooden spoon for mixing. I suggest you don’t use metal because you don’t want to break the glass mason jar with your beautiful starter inside. If you are wondering if I did that, the answer is yes, that did happen. What a mess! 3. Place your starter in a corner of your kitchen that stays relatively warm (between 70°and 80°). The space shouldn’t be a drafty area. 4. Every 12 hours, check the starter and if you see bubbling and hooch developing (1) pour off hooch (2) add 40 grams of brown rice flour and 40 grams water. Mix. Cover. Store in a secure place. Each time it is fed it will grow. 5. Use your nose too! When you see bubbles throughout your starter and it has a sour smell with a hint of sweet, you have a mature sourdough starter! The perfect sourdough starter may take between 4-10 days. The starter will have doubled in size. 6. Use it in Gluten-Free Sourdough, page 101. 7. Once you have used it and have some starter remaining in the jar, begin the process again. Feed, mix, cover, repeat daily until it’s ready to bake with or store in the refrigerator. 8. When your starter is ready to store in the refrigerator, place a top loosely on the jar and place it in the back of the refrigerator to ensure it doesn’t get knocked over. The bacteria will continue to grow and need to be fed once a week. As I have read, and witnessed, the wild yeast will continue to rise just slower…like it’s sleeping. Feeding it once a week will allow you to continue to have a viable usable sourdough starter! 9. I like to have a few starters going because when you are allowing the wild yeast to grown and create that perfect starter, you are also going to need a decent volume. For example, my recipe calls for 250 grams. This can be tricky if you are feeding your starter a little at a time to build that perfect starter and you are impatient for MORE sourdough bread! I always have a backup just in case I want/need a loaf quicker than it will take to build that the volume I need for another loaf of beautiful gluten-free sourdough bread with the perfect wild yeast starter. Tip: * You will soon become a PRO at knowing exactly the perfect consistency when you are feeding the starter. I believe you too will be like me and trust your gut with the amount of flour and water in order to achieve that smooth consistency that is not too watery like a slurry but more like a roux. *I prefer a wide mouth jar 5.75” wide (.75 liter) (link for these jars) because it is easier to mix within the jar and scrape every morsel out when the time comes to use it or transfer it into another jar. *Keep a log of when you fed the starter and how it responded. *I read that too much “hooch” could mean over fermenting. Then I read on King Arthur flour website that it could mean you might not be feeding it enough. (The “hooch” is the liquid that collects on the top of your starter when it hasn't been fed in a while. It’s the liquid is the alcohol given off as wild yeast ferments.) *Have multiple mason jars available to mix starter and transfer in to clean jars if needed. I did leave the starter in the same jar for several days and then when it became yucky looking on tope I transferred into another jar (scraping every tiny precious bit out) *Make sure you have plenty of the flour on hand to be able to feed your starter and watch it grow. The higher protein flour work well for making a sourdough starter. I * Once it goes into the refrigerator, I take a sharpie or stick up note and write the date of the last feed right on the jar. Or keep a note on your refrigerator. *I have found that I have very little “pour off” with the hooch if any. many people say to reserve the pour off for pancake or another baked good item. That is a great idea. In the beginning of your starter process discard it. Once it is growing, you can even pour some off and begin another starter for yourself or a friend! Preheat oven 400° You will love this bread you get from using my bread blend + some sourdough starter! Me and my gluten-eater husband love the loaf of bread you get by just using this bread flour blend on its own as well! This loaf is reminiscent of gluten rye bread with it’s perfect tight structure that is more dense and excellent for a hearty sandwich! Jen’s Bread Blend 250g potato starch 100g tapioca starch 85g lupin flour 125g fine white rice flour 125g sweet sorghum flour 15g xanthan gum Mix with a whisk for a couple of minutes until fully blended. Ingredients Small Loaf Double Loaf ½ Tbsp avocado oil 1 Tbsp avocado oil 150g Jen’s Bread Flour 300g Jen’s Bread Flour 15 g maple syrup 25g maple syrup 8g salt 12g salt 12g psyllium husk powder 18g psyllium husk powder 5g active yeast 10g active yeast 150g filtered water 300g filtered water 65g sourdough (b. rice starter) 130g sourdough (b. rice starter) **extra brown rice flour to knead Directions 1-In a small bowl mix together the water, psyllium husk powder, yeast and maple syrup. 2-In a large mixing bowl, mix together the dry ingredients. 3-In the large mixing bowl, add the sourdough starter to the dry ingredients. 4-By this point the smaller bowl of wet ingredients should have become like a jelly-like consistency. 5-Add the wet ingredients into the larger bowl. 6-Begin to knead the dough by hand. You can turn the dough out onto the counter and knead until completely smooth. You may need a bit of brown rice flour to achieve a perfectly smooth, yet still moist, loaf. 7-Place in a bowl or banneton (proofing bowl) and cover with a towel. Allow it to rise at least an hour. 8-Place the dough in a loaf pan that you have spread oil (avocado or olive) on the bottom. Also lightly brush the top with oil as well. You can sprinkle a bit of course salt on top if you desire. 9-Using a bread lame (or sharp knife) score the top of the bread and place it in your pre-heated oven. And bake for 10 minutes. Then lower the temperature to 350° for another 52-55 minutes. 10-Allow to cool, slice, and enjoy! These pancakes with buckwheat flour, almond flour, and this neat blend I like (Beth's grain Free Blend) make pancakes that are like little PILLOWS of love! Ingredients 1 Tbsp baking powder 1 tsp baking soda, 1/4 tsp salt 1 tsp xanthan gum 1/4 cup almond milk 1/4 cup honey 2 eggs 1/2 cup buckwheat 1/4 cup almond flour 1/2 cup @bethblends grain free flour (use another GF AP flour if you don't have- you can find the link on "Jen's Favortie" page-click here) 2 tsp @singingdogvanilla
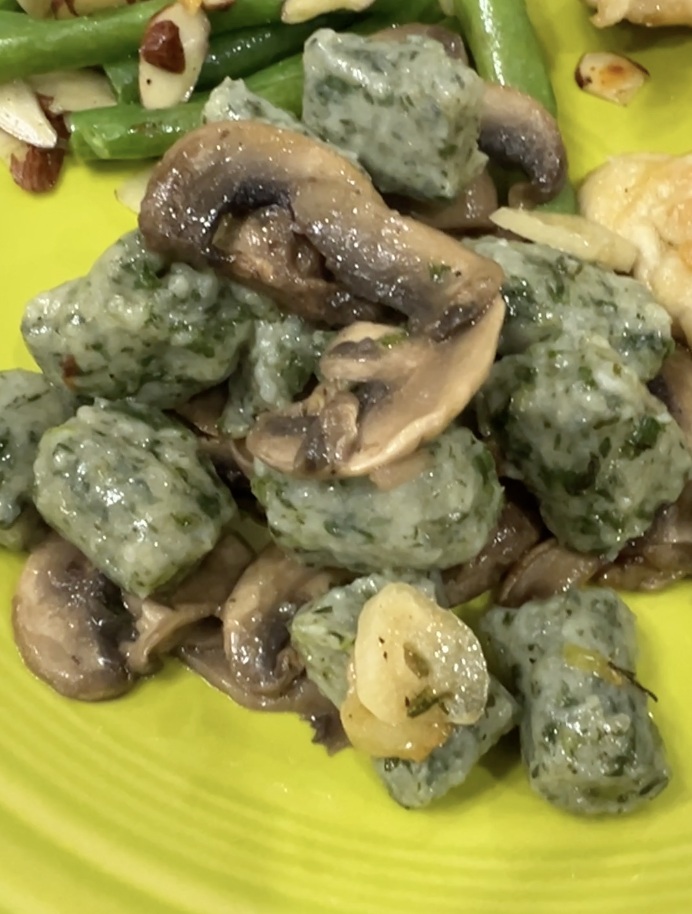
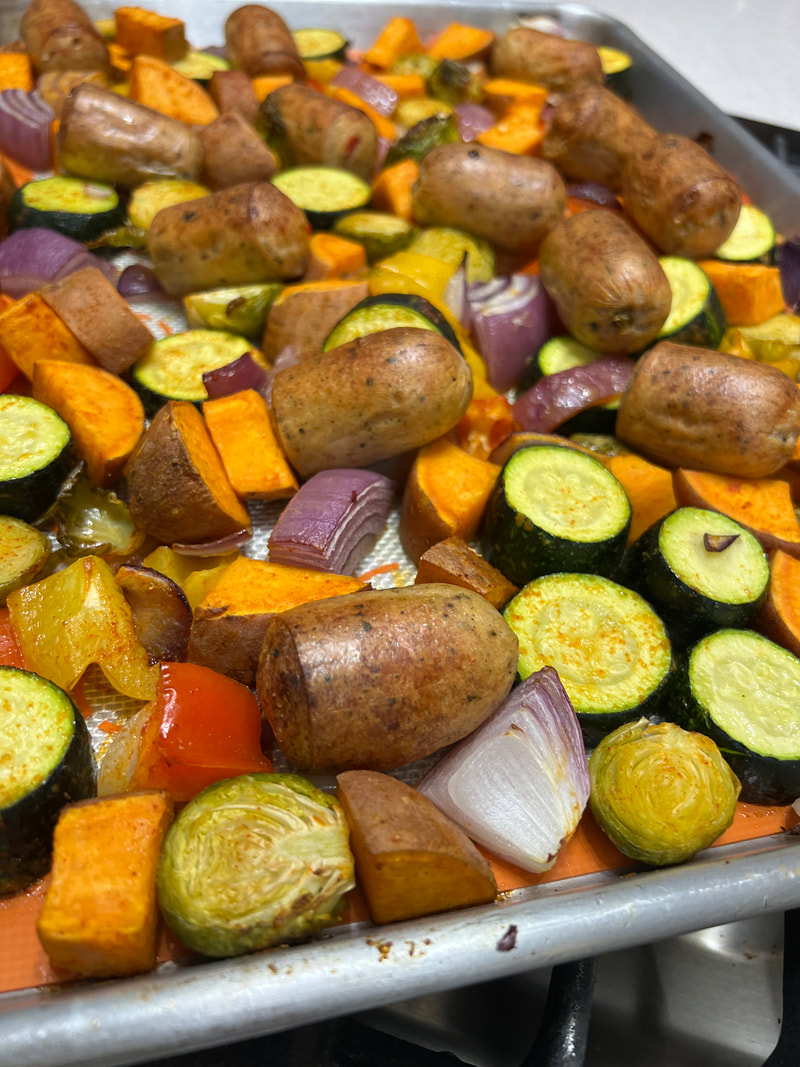
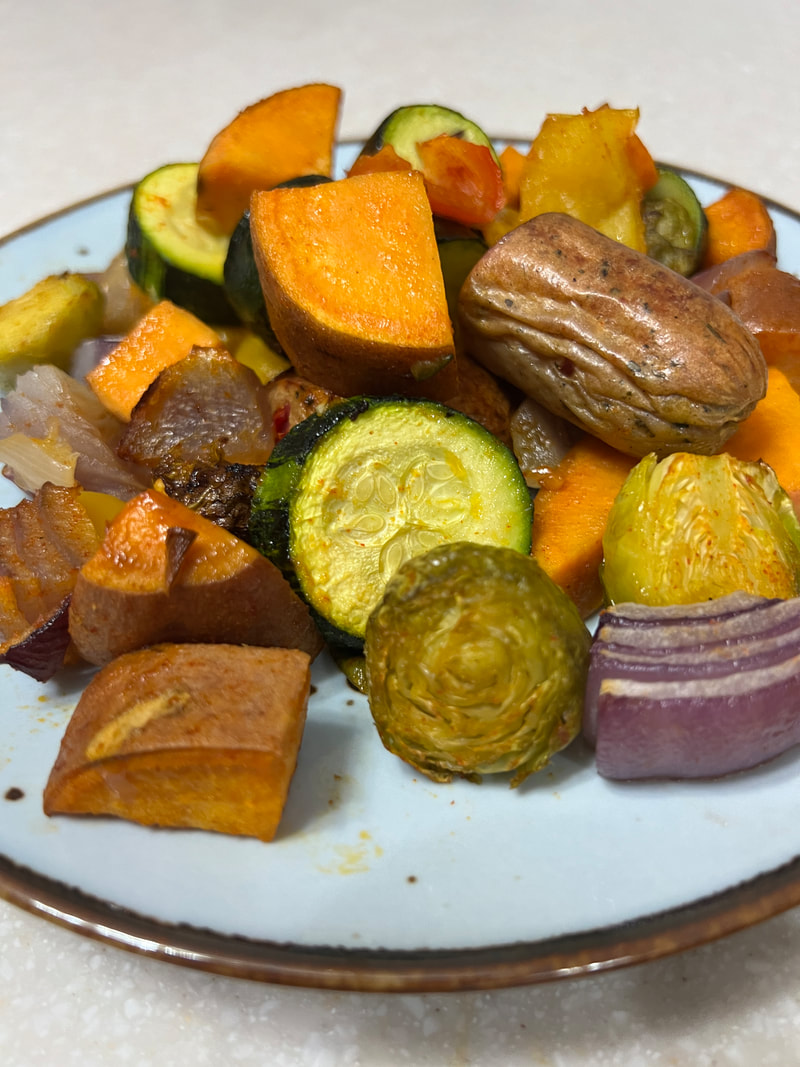
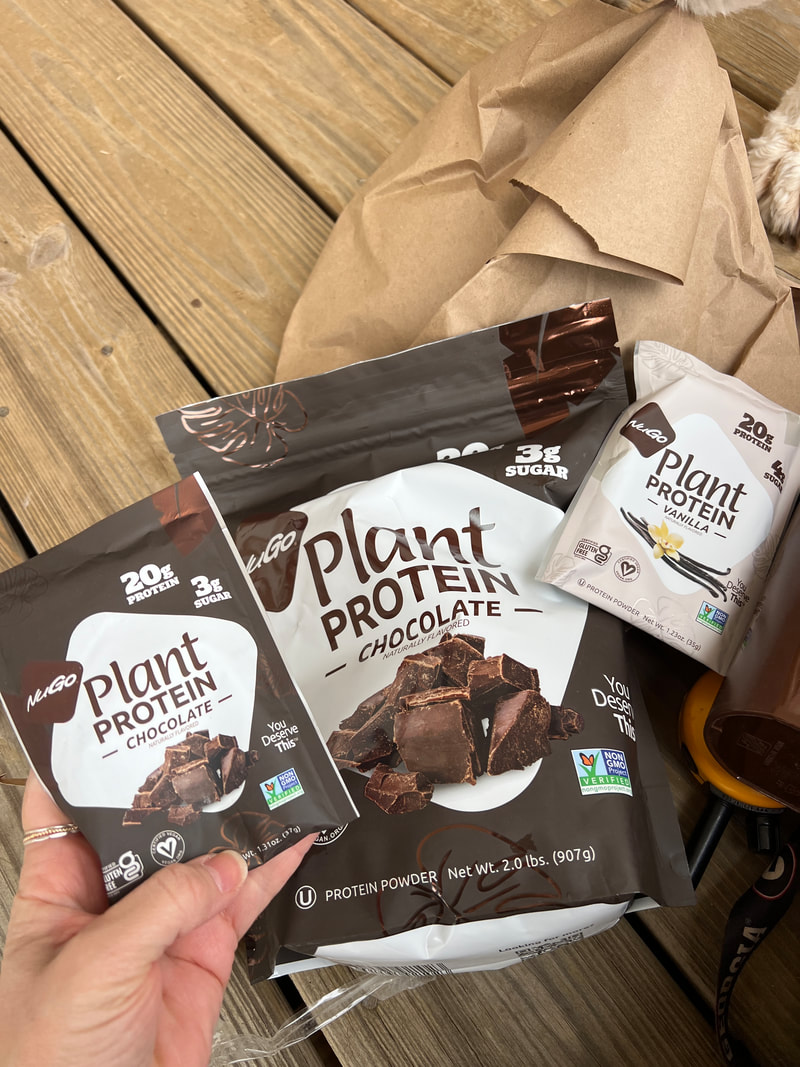
Got some potatoes laying around? Let’s make some gnocchi then kick the dish up a notch and add some vitamin A, C, K, iron, folate, potassium and even a bit of protein by adding SPINACH! PREP TIME: 1 hour COOK TIME: 10-15 minutes INGREDIENTS 1 pound russet potato, baked 3-4 cups of fresh spinach yield -1 cup fresh spinach, sautéed, pureed 1 Tbsp extra virgin olive oil ¾ cup gluten-free all-purpose flour *rice flour (or gf AP flour) for dusting surface if needed 1 ½ tsp salt ½ tsp pepper DIRECTIONS 1. Bake the potato: Poke a few holes in the potato with a fork, place on a baking sheet and bake for 40-45 minutes in a 400 degree oven. 2. In a large sauce pan add the olive oil and fresh, roughly cut, spinach, ½ tsp salt and pepper and sauté until wilted. 3. Place spinach in a food processor and blend until pureed. Squeeze the excess fluid from the spinach and set it into a medium mixing bowl. 4. Once the potato is cooked and cooled enough to handle, take the inside of potato only and place through a food mill, potato ricer, spoon and strainer. You CAN place in a food processor, but be careful not to over mix as this method does have have the tendency to make the potatoes a bit sticky and not as airy as these other processes. 5. In the same bowl as the spinach, add the potato, flour, 1 tsp salt and mix well. 6. Lightly dust the work surface and roll into long tubes about ½ inch thick. Cut into ½- ¾ inch pieces. 7. In a medium pot bring water and a dash of salt, to a rolling boil. Add ½ of the gnocchi into the water. Once they are all floating to the top, skim them out with a slotted spoon. 8. Allow the water to boil again and repeat. We enjoyed this dish with a garlic oil and butter sauce. 8 - 10 garlic cloves, chopped 6 Tbsp salted butter 4 Tbsp extra virgin olive oil 2 tsp salt In a medium frying pan add all the ingredients and cook on a medium heat until the garlic is lightly brown. Pour over the gnocchi and top with your favorite cheese! When you have lofty ideas for dinner with a limited amount of time to create, this dinner is bound to please everyone in the family. PREP TIME: 15-20 minutes COOK TIME: 25-30minutes OVEN TEMP: 400° INGREDIENTS 1 sweet potato, diced 1” pieces 1 large red onion, large diced- 1” 2 zucchinis, sliced 1” thick ½ red bell pepper, 1 ½” pieces 12 brussel sprouts, cut in half ½ yellow bell pepper 12-16 ounces spicy chicken sausage or chicken and cheese sausage, each link cut into 1/3’s 2 Tbsp extra virgin olive oil 1 tsp salt 1 1/2 tsp garlic powder ½ tsp paprika DIRECTIONS 1-Line your baking sheet with silicon or parchment paper (for easier cleanup). 2-Cut ingredients according to above suggestions. 3-Place all the veggie into a medium mixing bowl. 4-Sprinkle with the olive oil and mix until the vegetables are evenly coated. 5-Next sprinkle the salt, paprika, and garlic powder over the vegetables and mix until evenly distributed. 6-Place the vegetables onto the baking sheet. 7-Next place the cut pieces of sausage onto the baking sheet. 8-Place into the pre-heated oven for 25-30 minutes. *Note: Many of the seasoned/flavored chicken sausages are pre-cooked, if you are using a raw chicken sausage, check the temperature to ensure it is 165° before serving. This muffins delivers on flavor and PROTEIN! Each muffin is approximately 8g of protein each. Preheat 350° Silicon muffin tray or individual muffin cup/mold Ingredients 74 g NuGo protein powder (or other high protein powder 2 tsp cinnamon 1 ½ cups tigernut flour 3 eggs, room temperature 2 tsp baking powder 1 ¼ cups lactaid milk (or milk or almond milk) Ingredient for Drizzle 4 ounces semi-sweet chocolate ½ Tbsp coconut oil, melted 2 ounces unsweetened peanut butter Directions
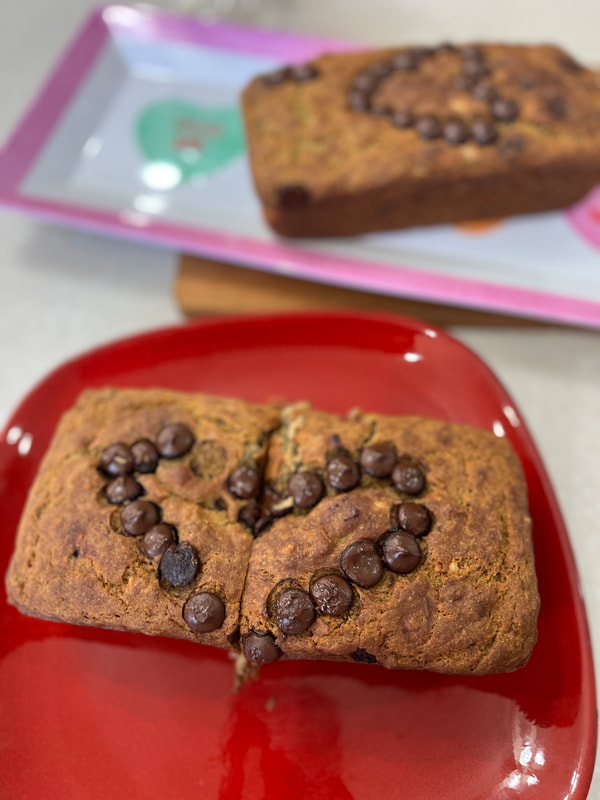
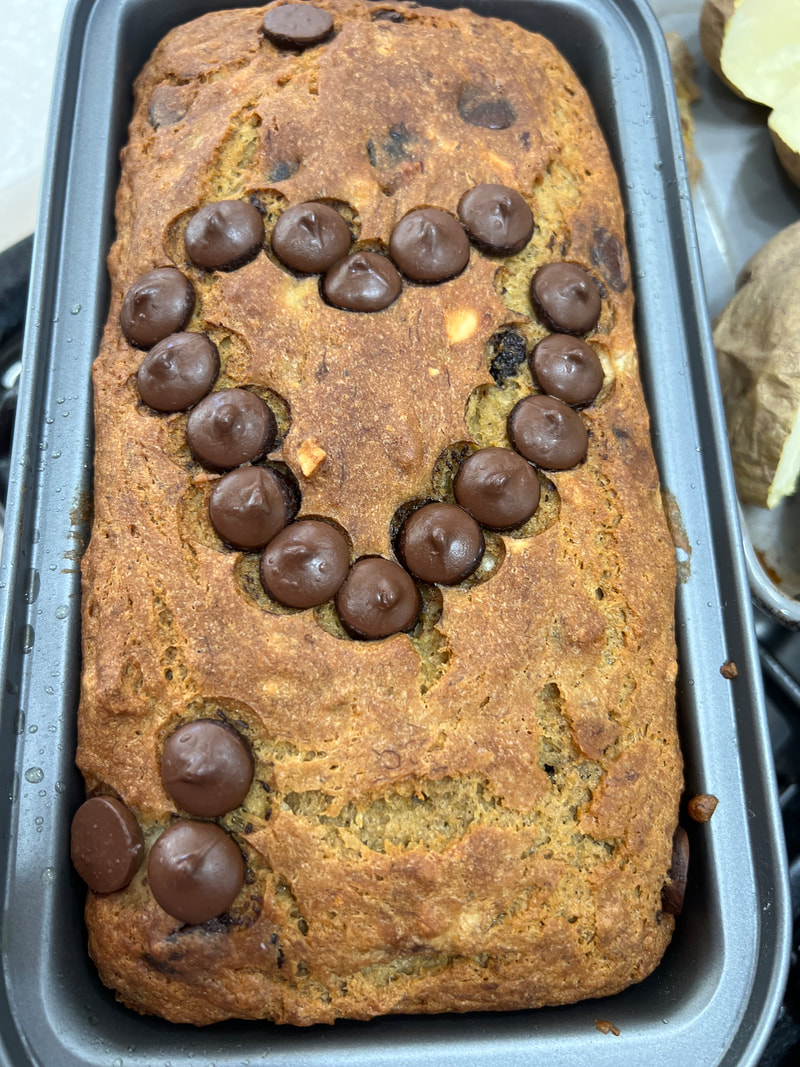
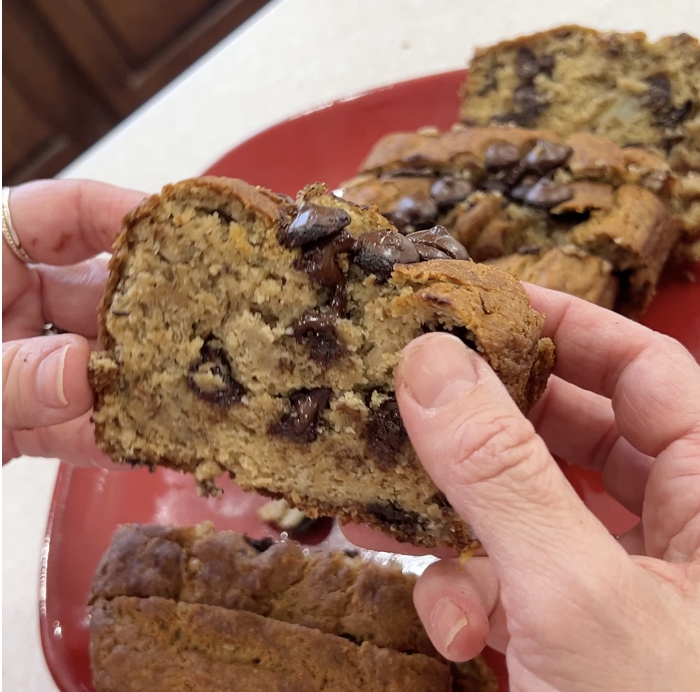
We couldn’t get enough of this yummy bread! PREP TIME: 10 minutes COOK TIME: 45-50 minutes OVEN TEMP: 375 ° 2 8x 4 loaf pans INGREDIENTS ½ cup sweet sorghum flour ½ cup fine brown rice flour 1 cup millet flour ½ cup coconut flakes 1 Tbsp baking powder 2 tsp baking soda 1 tsp salt 1 tsp cinnamon ½ tsp nutmeg 1 Tbsp psyllium husk 5 ripe bananas, mashed ½ cup coconut oil 1 cup almond milk (or milk) 1 Tbsp apple cider vinegar 1 Tbsp vanilla extract ¾ cup maple syrup 2 eggs 2 tsp vanilla Optional: 1 cup 53% dark chocolate cacao chocolate chips A bit of rice flour for dusting DIRECTIONS 1.Whisk the dry ingredients together. 2.In separate mixing bowl, add the milk, vanilla, ACV, and maple syrup and mix. 3.Add in the dry 1/3 of the ingredient mixture, then add an egg. Mix. 4.Repeat again, mix. 5.Add the last bit of dry ingredients and then add the coconut oil. Mix. 6.Add in the coconut flakes and chocolate chips (if you choose). Mix. 7.Take a dab of coconut oil and spread it on the bottom and sides of the loaf pans. 8.Sprinkle with rice flour then tap the sides of the pan to distribute it. Throw away the excess. Place in preheated oven and bake for 45-50 minutes. |
AuthorJen Fiore has been cooking and baking gluten-free for herself and her family since 2003 & is happy to share her recipes with you! |


 RSS Feed